Installation steps for WHMCS
- Unzip, and upload all files to the root of your WHMCS folder. Keep the directory structure intact.
- Go to "System Settings" and select "Addon Modules".
- Find IrisMail.cloud addon, and select "Activate".
- Select the "Configure" button. Insert your License Key and check any other features you would like enabled.

- Enter a "block" message you would like displayed to clients when entering an invalid email at registration.
- Click on Save.
- Select "Addons" at the top menu, then select "IrisMail.cloud"
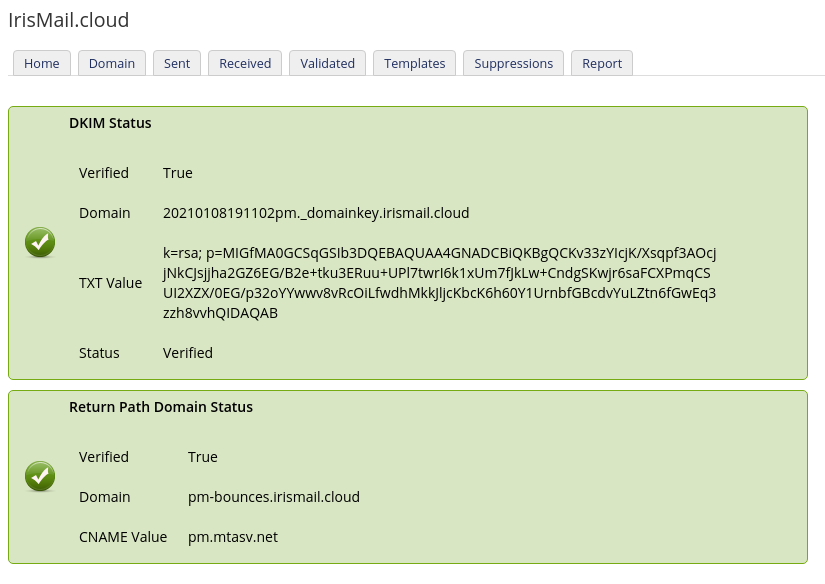
- Verify you License Key is "Active". Check your domain status.
- Click on the "Domain" tab and follow the instructions to add DNS records to verify your domain. Once verified, all boxes should be "Green".

- After you domain is verified (takes about 60 minutes), Go to "System Settings", then select the "General Settings" link.
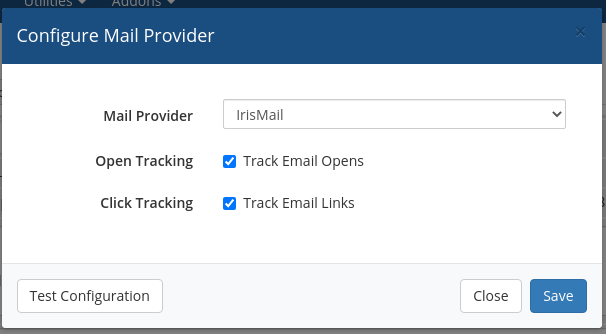
- Select the "Mail" tab. In the mail provider box, select "IrisMail" and click configure.

- Select Open and Click tracking as needed. Click on "Test Configuration". This will verify everything is working properly and setup your webhooks automatically.
- Select Save. A test email will be sent to all admins.
- Next, go back to Addons, IrisMail and select the "Templates" tab.
- Change your template sending priority as needed. Click save.
- Done!
